Friday, April 24, 2015

Word Tiles Game for Fluency


Yesterday I introduced a new game to my class using buckets of word tiles (Tub O' Words from Lakeshore- you could also write the words on paper, beads, etc).

I cannot believe how much my students love this game! And moreso, how much they say the words and talk about phonics when playing!

"Aw you got their- that was my word!"

"Look- you have was and saw- that's backwards."

"cute fat cat" making phrases out of the words or reading all of the tiles they have. 

The tiles have a mix of sight words, short vowels and long vowels. It is great practice for students who are still working on identifying long vowels. Ex: if a student got cute but said cut, I could say, "well, there's an 'e' on the end so it's....." and the student would say "cute!"

Check out the video to learn how to play!


Basics:
1. If you say the word correctly, you keep the word
2. If you get an underlined word, put all of your tiles back *Forgot to mention that I also swapped an orange for a green in each bin- if you get that tile it means that you get an extra turn. You could also circle the word to indicate that you get to go again.


Friday, April 17, 2015

Practice: Adding Tens


This video shows a fun way to practice adding tens using playing cards. I use this game as a math center, or also as a task students can do when they finish early.

The video highlights three strategies to solve to find the sum:
1) Skip Counting by 10's 
2) Adding On with 10's 
3) Using Ones to add 10's

This game is closely related to Tens War. To play Tens War, each partner needs a stack of cards. Simultaneously, the two partners draw 2 cards. Each student determines the sum of her cards. Whoever has the higher sum gets to keep all 4 cards. 

Friday, April 3, 2015

The Best Part of Me Project


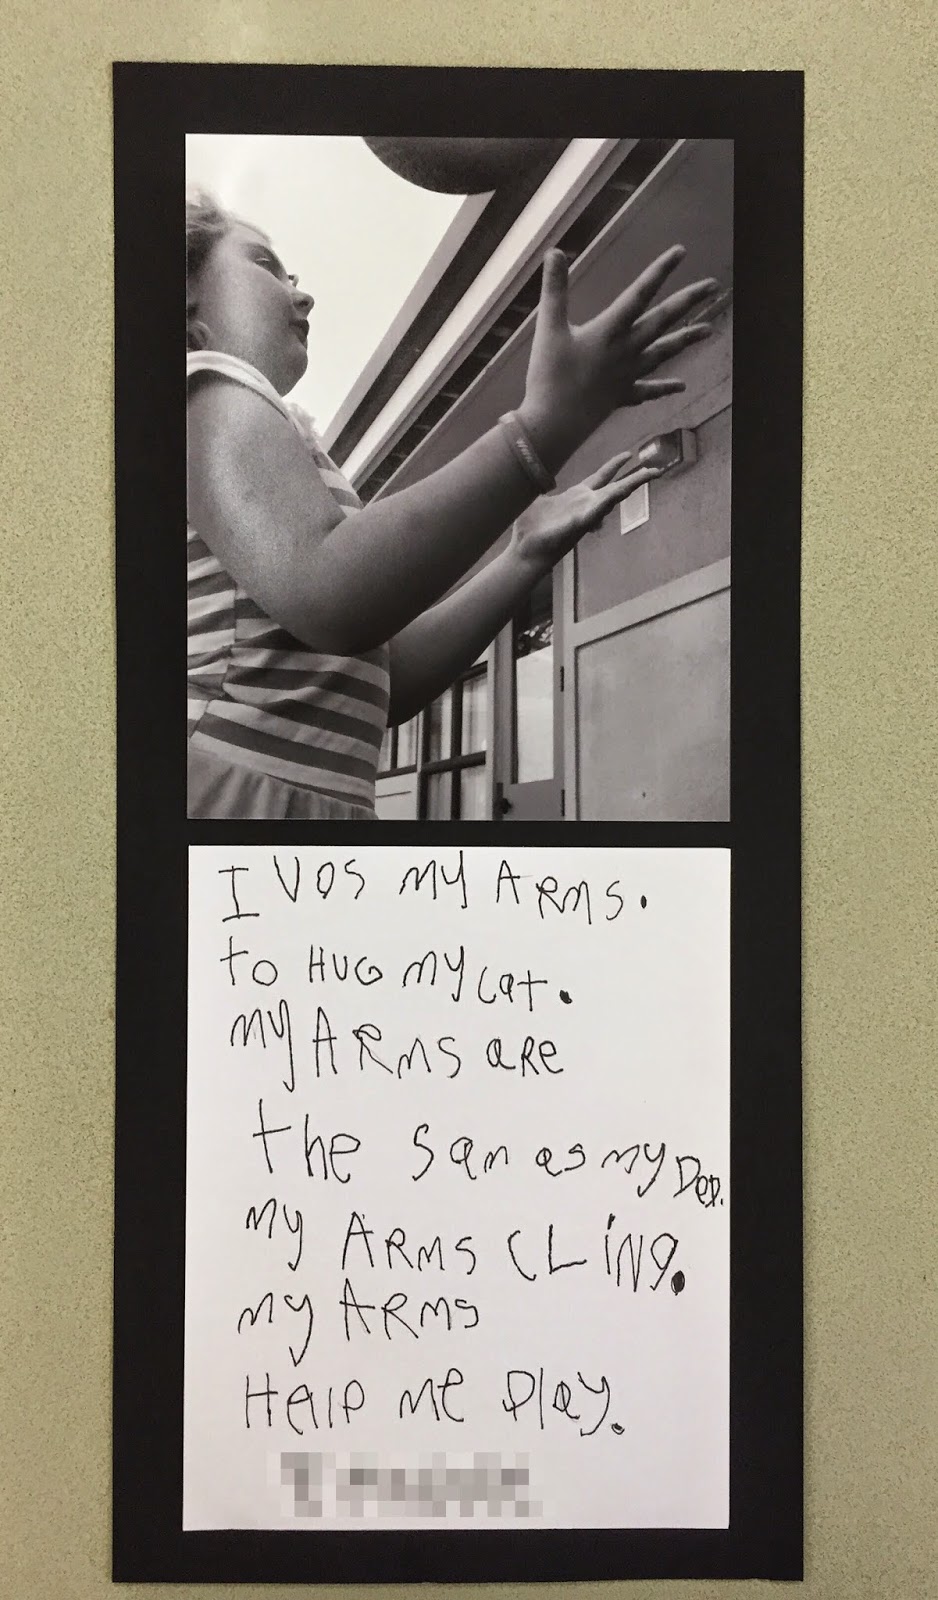
My first graders worked extremely hard on these poems based on the beloved book, The Best Part of Me: Children Talk About their Bodies in Pictures and in Words by Wendy Ewald. I want to share the process that helped students create such masterpieces.


First, I read two poems to the students, stopping each time to ask what they liked about the poem. After the third poem, I got out some paper to start recording what we liked. I knew that we would use this later for inspiration. I read a total of about five during this session. 


The next day I worked with half the class at a time. I reviewed the chart then read two more poems to the students, again asking them what they liked about each poem. Next, I told the students that it was their turn to write their own 'Best Part of Me' poem. 

Once students had chosen what they intended to write about, I handed out the graphic organizers (click here). I helped the students fill in the bubbles by going through each technique on the list one at a time. Ex: I asked the students if the body part that they had chosen reminded them of anyone in their family.


Later that day, I returned the graphic organizers to students whole class and explained how to transform the bubbles into sentences that would form a poem. I worked with a small group who needed extra help.

The next day I had students copy their poems onto 8x10 papers- encouraging them to write with a margin by drawing a pencil line for them to always start writing at. Last, they traced over their letters with sharpies. I later erased pencil marks and mounted each child's photograph and poem together.

This was a long process, and it was well worth the time and energy!